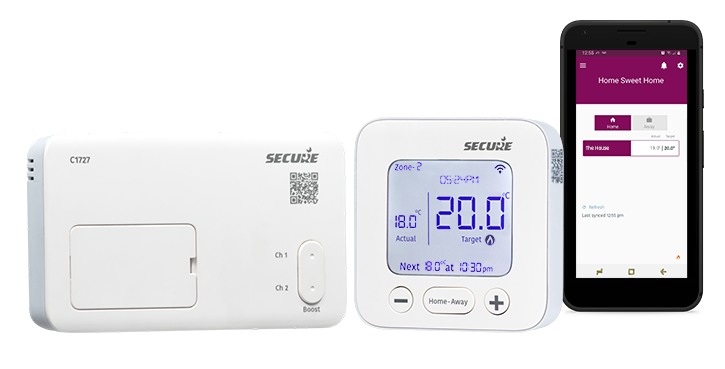
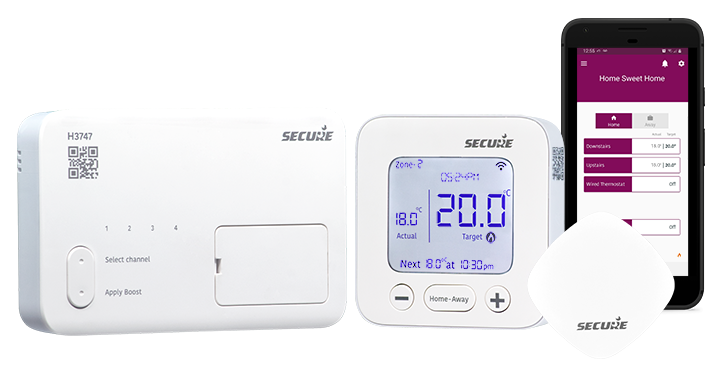
The C1727 is a 2-channel smart programmer that controls heat pumps, combi, and system boilers. Out of the box, it is Bluetooth and app-enabled, with the option of a plug-in Wi-Fi adapter for complete smart control. The C1727 is designed to supersede the Centaur Plus and Service Plus range of time switches and programmers by using the same wall plate with minor wiring changes, providing the benefits of extra connectivity. The C1727 can easily control a single or double heating zone, or heating and stored hot water system. You can even control the schedule of an existing wired thermostat or add extra sensors to a spare zone to give further control. There is no hub or gateway to configure and power for remote access; simply plug the Wi-Fi card into the front slot, provide the password via the app, and you will be connected. The C1727 also includes many of the latest Boiler Plus energy-saving features, such as optimum start and stop per heating zone, as well as on-off load compensation. Moreover, it significantly improves boiler efficiency by preventing short-cycling and overshooting of temperature, and helping to save more energy and improve efficiency.
Product Standard: EN 60730-1, EN 60730-2-9
RED Radio: ETSI EN 300 328
RED EMC: ETSI EN 301 489-1, ETSI EN 301 489-17
Safety: EN 62311 :2008, EN62368-1 :2014
Mechanical
Dimensions (receiver)
91 x 153 x 32.5mm
Dimensions (PTD)
100 x 100 x 29mm
Weight (receiver)
161g (approx.)
Case material
Thermoplastic flame retardant
Mounting
6-pin standard wall plate
Environmental
Impulse voltage rating
Cat II 2500V
Enclosure protection
IP30
Pollution degree
Degree 2
Operating temperature range
0 °C to +40 °C
Storage temperature
-20°C to +70°C
Environmental humidity range
0 to 90%
Radio
Compliance
Bluetooth BLE compliant
Operating frequency
2.4 GHZ
RF range
~60 m, line of sight
Videos
Adding the user app for C1727 and H3747 – Part 1
Adding the user app for C1727 and H3747 – Part 2
Easily adjust the schedule of C1727 and H3747
Using Hold to turn your Secure C1727 and H3747 into manual mode
New Smart Programmer range from Secure
Introducing the new Smart Programmer range from Secure
Schedule and hold programming video for the new Smart Programmer range from Secure
FAQs
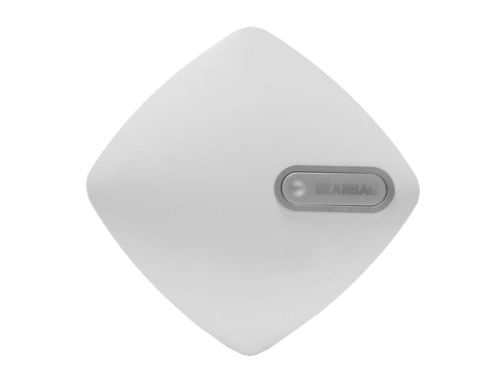
Press the button on the back of the PTD gently using a pen or pencil to wake it from deep sleep.The PTD is set to deep sleep for shipping to conserve battery life.
The PTD that comes with the system should connect automatically when the system wakes up.
To wake and pair the PTD:
Press the button on the back of the PTD
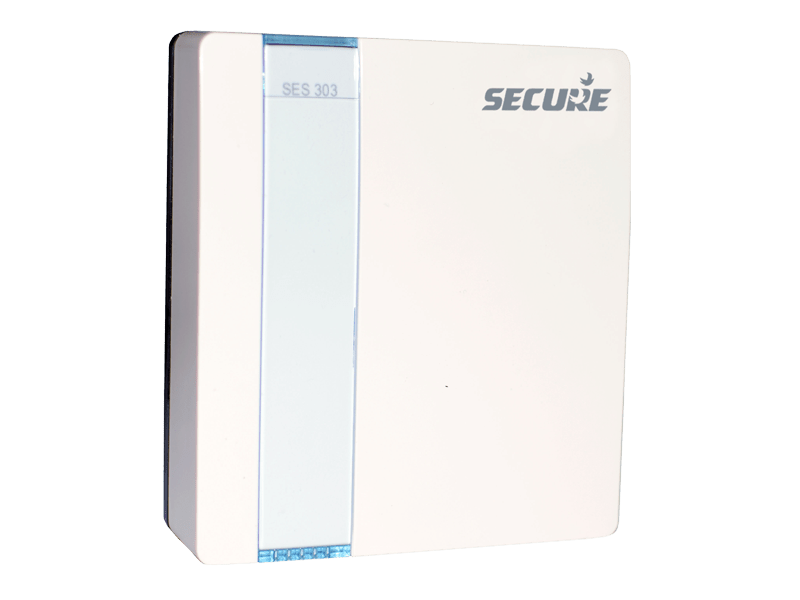
Go to the receiver (rectangular white box with CH lights and ‘Secure’ branding) and press any button for 8-10 seconds, then release.
Press and hold the Menu button on the PTD.
If it does not connect:
Put the receiver into pairing mode by pressing the Boost button for 8 seconds. Then, press the Menu button on the PTD to start the pairing process. Pair any additional PTDs using the same process.
Possible causes and solutions:
Receiver not in pairing mode:If you have reset your system, then your receiver is not in pairing mode. Go to the receiver (rectangular white box with CH lights and Secure written on it) and press any button for 8-10 seconds, then release. Try searching on the PTD again.
Out of range:Move the PTD closer to the receiver while calling for heat. (You might need to press “Home-Away” to clear the error message and access the menu.)
The PTD has lost connection to the system, and you will need to reset the PTD to pair them. (Note: in the Menu, the + and – allow you to navigate through each option and ‘Home-Away’ allows you to select them.)
Press Menu twice until “In progress” appears.
Press ‘Home-Away’ to clear the ‘Comms Error’ message.
Navigate to ‘Advanced Settings’ using +.
Select this option and type ‘1854’. Use + and “Home-Away” to select each subsequent digit.
Navigate to ‘Factory reset’ and select.
Then, go to ‘Reset PTD’ and select.
Change “No” to “Yes”, using +. The screen will go blank.
On the receiver, press any button for 8-10 seconds until CH1 light flashes. This enables Bluetooth pairing.
On the PTD, press and hold Menu for a few seconds.
Confirm the serial number by selecting ‘Yes’ and ‘Hot water’ control if prompted.
Distance, property layout, or walls can affect signal loss.
Warning are usually for when the battery is low, thermostat has lost the connection, or Wi-Fi disconnection. To find out which among this is the reason:
Press the Menu button
Navigate to Warning and read the message
The system will also display the zone number with the issue.
If you have reset the system and are trying to re-pair, this usually means the receiver is not in pairing mode.
Press and hold any button on the receiver for 8–10 seconds
Release when CH1 flashes
Pair the PTD again
Go to Settings (cog icon, top right). Device information will show the zone number and serial number of the PTD or sensor assigned to it. The serial number is also printed on the back of each device.
You will need to perform a full factory reset and re-pair all devices. This will return the system to its original factory settings.
To do this, follow the steps given below:
On the PTD, press the Menu button twice until ‘In progress’ is displayed.
Use the + button to navigate to ‘Advanced settings’ and select it.
Enter the PIN ‘1854’ using + and ‘Home-Away’ to select each subsequent digit.
Navigate to ‘Factory reset’ and select it.
Go to ‘Reset system’ and select it.
Change the option from no to yes using +, then confirm.
Power off the receiver for 10 seconds, then power it back on.
Once the channel LEDs are illuminated, press and hold any button on the receiver for 10 seconds, then release. The CH1 LED will begin flashing.
Press and hold the Menu button on the PTD to establish the connection.
The PTD will ask you to confirm the serial number (SR) to ensure you are pairing with the correct receiver.
The PTD will then ask whether to ‘Control hot water’. Select yes to add hot water to the system, if you have a separate hot water zone.
Note:
If you were using the mobile app previously, tap the three-line menu in the top-left corner and select ‘Add new system’ to reconnect.
The system will remove all users, and you will need to scan the QR code to add the system again.
Any additional devices will also need to be re-added.
If you have additional PTDs, they must be reset before rejoining the system. Navigate to ‘Factory reset’ and select ‘Reset PTD’. The screen will then display “Hold Menu to setup”, allowing you to rejoin the system manually or using the app.
Yes. It is compatible with oil and gas-fired boilers.
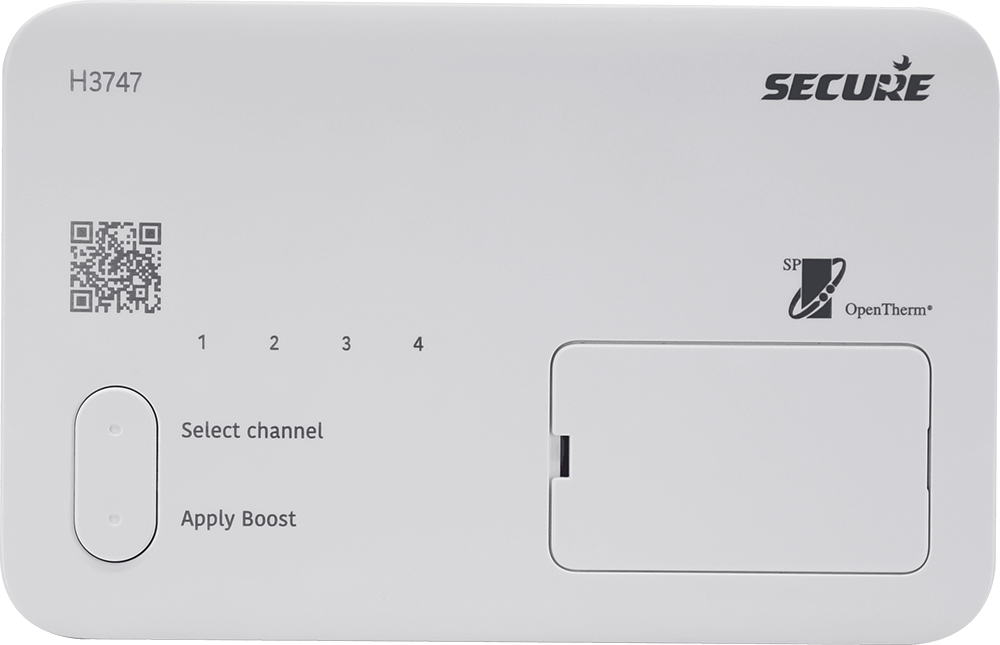
The channel buttons function as ‘Boost’ buttons. When pressed, they boost the relevant heating or hot water zone for one hour. A white / yellow LED indicates power to the receiver, while a red LED indicates a call for heat or hot water is being sent to the boiler.
The target temperatures in the zones schedule act as your ‘On / off’ switches To do this, edit the zone schedule and set the target temperature to 30°C when you want the zone to be on, and 5°C when you want it to be off.
If you have a dual-band Wi-Fi router, the app may show that it is connected, but it may still be unable to communicate with the system.
Contact your internet service provider to confirm whether your router is dual-band and request that the 2.4 GHz and 5 GHz networks are separated.
Once this is done, the app may still remember the previous 5 GHz connection. If this happens, remove it from your phone, reinstall it, and rescan the QR code on the receiver to reconnect.
After completing these steps, you will be able to connect the app to the 2.4 GHz Wi-Fi network and use it normally.
No. All programming can be completed using the PTD.
Press the Menu button twice.
Navigate to ‘Settings’ by using + and – buttons.
Go to either ‘Add sensor’ (for a wireless) or ‘Add wired device’ (for wired thermostat), depending on which the device is controlling the zone.
Select the zone you wish to create.
To confirm, you can go to ‘Schedule’ to see the new zone and set the programming for it.
No. Leave them wired as previously installed. During setup, select ‘Add wired device’ (wired thermostat option) for the relevant zone. The system will then only control the ‘On / off’ times for these channels. These can be edited in ‘Schedule’.
Note: CH3 / Zone 3 is the hot water channel.
First, remove the batteries from the sensor for 10 seconds. Reinsert the batteries to put the sensor into pairing mode. On the PTD, press Menu and navigate to ‘Settings’. Here, select ‘Add sensor’. Follow the on-screen instructions to complete pairing.
The PTD is required to configure the system schedule and settings, so it must be linked to the receiver. By default, it controls the main heating channel.If, for example, you have an H3747 with two heating zones and one hot water zone, and you would like to use a wired thermostat on Zone 1, you have the following options:
Connect the wired thermostat to the required channel (e.g. Zone 1) so it regulates the temperature. Use the PTD to determine when the zone is on or off by setting ‘Hold until cancel’ (see above question and answer).
Set target temperature:
30°C when the zone should be on
A lower temperature (e.g. 15°C) when the zone should be off
Set the PTD target temperature to 30°C in the Schedule.
This provides constant power to the wired thermostat, allowing it to fully control the zone temperature.
Yes. The PTD can be used to control zones without TPI (cycling), which is suitable for heat pump systems. To do this, the system must be set to ‘Economy mode’.
To enable ‘Economy mode’:
Press the Menu button twice on the PTD.
Navigate to Settings > Heat Mode.
If Economy is not already selected, select Economy.
Once the system is in ‘Economy mode’, TPI will be disabled and the system will operate correctly with heat pumps.
If’ Optimum start’ is enabled, the system may turn on earlier so it can reach the required temperature by the scheduled time. You can turn it, on or off in the system options.
On the top of the PTD, press Menu twice until it shows ‘In progress’.
Navigate to ‘Hold’ and select it.
When ‘Hold for 1 hour’ appears, press + to increase the time until it changes to ‘Hold until cancel’.
Press ‘Home-Away’ to confirm.
The display will briefly show ‘In progress’ and return to Hold.
Press ‘Menu’ once to return to the main screen. ‘Hold’ will now appear under the target temperature.
You can now use + and – to adjust the temperature as required.
We recommend setting a minimum temperature of 15°C.
To change the default schedule on your PTD, follow the steps below:
In the menu, use + and – to navigate and select using ‘Home-Away’.
On the PTD, press Menu twice until it shows ‘In progress’.
Navigate to ‘Schedule’ and select the required zone.
Select the day.
Set the time and target temperature for Period 1, then press ‘Home-Away’ to confirm and move to Period 2.
Note: If you do not want heating during certain periods (e.g. Periods 3 and 4), set both periods to the same time so no signal is sent to the boiler.
After choosing options for each period, and the final period 6, you will be asked whether you want to copy schedule. Say yes or no using +.
If yes, choose the days you want to copy the schedule to and confirm.
When prompted, select no for continue Copy and no for continue editing to save the schedule.
The screen will display ‘In progress’ while the schedule is copied and saved successfully.
You have likely pressed the ‘Home-Away’ button by mistake. This toggles the system to be on as normal (Home mode) or to be switched off completely (Away mode).
Simply press ‘Home-Away’ again to allow the system to follow the programmed schedule.
If the zone is set as an ‘On / off’ channel (for example, a hot water channel or a zone controlled by a wired thermostat), the PTD will display a padlock symbol. This means you must go to ‘Schedule’ and adjust the ‘On / off’ times there. The zone cannot be manually controlled from the main PTD screen.
On the PTD, press the Menu button twice (or until the screen shows ‘In progress’).
Press the + button until Advanced settings is displayed, and then select it using ‘Home-Away.’
Enter the PIN ‘1854’ using + and ‘Home-Away’ to select each subsequent digit. When ‘Limit user control’ is displayed, select it.
Press + until you see ‘Local control’, then select it.
Select ‘Enable local control’. The screen will show ‘In progress’.
Press Menu until you return to the main screen.
You will no longer see the padlock symbol, and you can adjust the temperature normally.
The landlord settings for this device can lock a minimum and maximum temperature range.
This prevents the PTD or the app from adjusting the temperature beyond the set limits. Please contact the landlord for further information.
This indicates that the council or housing association has set the boiler service reminder. Contact them straight away to ensure the boiler is properly serviced.
Unless you are a council or housing association, there is no need to access these settings, as they are used for service interval periods.
If the caller is an installer for the appropriate organisation, the organisation must email technical support to request the access code.
App issues
The only difference between these two options is that selecting “I am the installer” will not save your account to the system. Once the initial setup is complete, all account data associated with the installer option will be automatically removed.
This is most likely because the app is in Installer mode. To resolve this, delete and reinstall it.
When reinstalling, you do not need to create a new account. Enter the same login details and select “I am the user” during setup. This should resolve the issue.
Ensure that you are scanning the correct QR code. This is the QR code located on the front of the receiver.
Check that all required permissions in your device’s app settings are enabled (for example, Bluetooth allowed while using the App).
Make sure you are scanning the QR code from within the App, not using your device’s normal camera.
If the issue persists, delete the App and reinstall it, then try again.
If it still does not work, try using another device to download the Secure Controls App (ensuring all permissions are enabled) and attempt the scan again.
No, Wi-Fi is not required for local control (Bluetooth) of heating via the app. If you require remote control using your home Wi-Fi, you will need to purchase the Secure “HC2.4” optional Wi-Fi extender.
First, try logging out of the app and then logging back in using your email address and password.
If the issue persists, please follow the steps below: For all Users (connecting over Bluetooth):
Delete it; turn your phone off, and power cycle the C1727 / H3747.
Restart your phone and download ‘Secure Controls’ app again.
On your phone, go to Settings → Secure Controls and ensure mobile data is on and all permissions are enabled (set to on), including:
Location (on while using the app)
Bluetooth
Camera
Background app refresh
Note: The app will not connect if any of the permissions are missing.
Open it, sign in to your account, tap the ‘three-line menu’ in the top left corner and select ‘Add new system’.
Scan the QR code on the front of the Receiver (wired to the heating system). Press and hold the Boost button for 8 seconds until the CH1 light begins flashing, indicating it is ready to pair.
Follow the in-app instructions, selecting ‘No’ to ‘Retain users’, and wait for your system to appear.
If you are using Bluetooth only, or if your phone is too far from the receiver, try moving closer. The receiver range should cover most homes and multiple floors; however, placement inside a cupboard or near thick walls can reduce signal strength.
Upgrading to Wi-Fi removes this limitation, as the system will always use Wi-Fi when available.
Connecting over Wi-Fi (with the optional Secure HC 2.4 Wi-Fi extender): Note: If you are installing the Wi-Fi extender, please power down the receiver before doing so.
1. If you are receiving a “Cannot establish communication” message with the Wi-Fi card installed, or the system is not connecting when outside the home / Bluetooth range, follow the steps below.
Ensure you have a 2.4 GHz router, or a dual-band router with a separate 2.4 GHz channel, or temporarily disable the 5 GHz band.
The Secure Wi-Fi Extender only connects to 2.4 GHz Wi-Fi channels. Some routers use 5 GHz only.
If you are unsure whether your router supports 2.4 GHz, contact your Wi-Fi provider. They can confirm this and, if required, split the dual bands into two separate SSIDs (network names) or temporarily disable the 5 GHz band.
Once confirmed, connect your phone to the 2.4 GHz Wi-Fi network before attempting to pair it with the C1727 / H3747.
Once completed, if not already prompted, go to the Settings (cog icon) in the top-right corner of the app and select Wi-Fi settings.
Enter your Wi-Fi password and wait for the message “Wi-Fi credentials have been sent to device.”
You will then be able to control and programme your receiver from outside the home.
If issues persist, tap the three-line menu in the top-left corner, select ‘Help and support’, then ‘Send error logs’, and include a brief message describing the issue. Technical support will investigate further.
When using the app over Wi-Fi, the system is commissioned as normal. The person who completes the setup becomes the owner.
To add additional users:
Open the app
Using the lower – left menu, select ‘Invite user’ (the user’s email address is needed).
The new user must have the Secure Controls app installed on their device to receive the invitation.
Once the invitation is accepted, the person will be added as a user.
The invited user must have the app installed on their smartphone to receive the invitation.
Ensure the user has set up an account or logged in to an existing one.
Once done, tap the three – line menu in the top – left corner of the app, then select ‘Manage users’.
If the invitation has not been received, ask the user to check their spam or junk folder, as the email may have been filtered there.
Alexa question
In some cases, Alexa may successfully execute a voice command, but still respond with “Device not responding.” This can occur if the command takes longer than 8 seconds to complete, which is Alexa’s default timeout period.
If this happens, try issuing the same voice command again.
We use cookies to ensure that we give you the best experience on our website. If you continue to use this site we will assume that you are happy with it.OkNoPrivacy policy
You can revoke your consent any time using the Revoke consent button.Revoke consent